Silicon Slopes 2018 Sketchnotes posted on @sketchnotable

Silicon Slopes 2018 Sketchnotes posted on @sketchnotable

I have been asked frequently how to get started making iPhone apps. Having taught at an iOS development bootcamp for the past few years, I have seen many people approach iOS development and succeed well. Those that excel typically have the right attitude as well as the aptitude.
Part of the challenge is figuring out whether you have those two qualities, and to do so in the most cost- and time-efficient way possible. I almost always suggest the same three steps to people considering this, and thought it would be nice to write them down.
The first step depends on your familiarity with programming in general. Many people have heard of this “coding” thing, and want to get in on it, but all they know is that apps are cool. That is a great place to start, but it is very different from a developer who is looking to learn iOS development in addition to their other skills.
For those with no programming experience, I suggest some free exercises to learn some of the fundamentals. One of the best sources for those is an iPad app created by Apple: Swift Playgrounds app. This will walk you through a number of puzzles and challenges to teach you the basics. This has the added bonus of teaching them using the Swift programming language, which is what you will be using to actually code apps.
This is a great chance to evaluate whether your attitude is the right fit. With the basic concepts, you are not going to know for a little while whether you have the best aptitude, but you can get a feel for whether you enjoy programming in general. As you learn, you will find that programming is often frustrating for long periods of time, followed by a rush as you solve the problem. You need to discover as quickly as possible whether that is a process that you enjoy.
For developers looking to pick up iOS development, the Swift playgrounds app could still be helpful, but may feel overly basic and simplistic. Instead, Apple has created the Swift language tour that will help bring you up to speed on how to use Swift. The tour has additional links to more details about Swift to help those who prefer to go deep in learning the language.
Once you have a solid handle on the basics of programming and Swift, the next step is to build something. Again, Apple has created a great sample project to walk you through all of the details required. This is a great resource because you can start with the end in mind, and have help all along the way to make that vision a reality.
By the time you have actually created an app, even though it is a simple guided project, you will have a much better idea of your attitude and aptitude fit. If the experience is starting to feel addictive, and you are anxious to create something that you want to have, that is a good sign. If you have been forcing yourself to push on just to finish what you started, you need to evaluate whether you want to continue to invest hundreds of hours in learning and continuing with iOS development. If you are learning programming for the first time, it is natural to need to reference documentation and other resources as you build your first project. Just because the solution does not come immediately to you does not mean that you lack the necessary aptitude. But if you finish the project, and still struggle understanding some of the basic principles, you need to do some honest introspection and decide if this is right for you.
The most important step is to try to create something that solves a problem that matters to you. This will stretch your ability to apply what you have learned. Up to this point, you have been focused on the “what” and “how” of iOS development. You need to advance to understanding the “when” and “why” of the different principles you have learned. When you tackle your own project, you have to determine at each step what you are trying to do, and evaluate the many options you have to solve the issue and choose the best fit and then implement it.
As you start to branch out beyond guided practice, you are going to need to rely on many resources. Obviously, searching the internet for what you are trying to do is going to be the first choice for many people. The risk in doing that is getting incomplete or incorrect information. When searching for resources, I suggest prioritizing the following resources above all others.
Apple has done a lot of work in creating a starting point to help developers approach different topics. Whenever possible, you want to start with a marketing-type page from the Apple developer site. A great example is the Apple iOS Developer page for getting started in general. Most of these pages are included in the Resources list of the main Develop page of the Apple Developer site. These pages are extremely helpful because they include an overview of the topic, along with curated lists of resources to dive deeper.
If there is not a developer landing page, or if you are ready to go deeper on a topic, you should look for a programming guide. These include detailed explanations along with sample code to help you understand a topic thoroughly. They can range from broad topics such as App Programming Guide for iOS to more specifics such as the View Controller Programming Guide.
Finally, you should look to the actual documentation Apple creates for the APIs you want to use. These can be found either online, or through Xcode. An example is the UIViewController documentation. As you become more advanced, you will find yourself referencing this kind of documentation more and more without needing the additional explanations that come in the developer pages or programming guides. The existence of these pages is one of the main reasons that I prefer iOS development to web development. If you ever have a question about how something works, or what is possible, you can go look at the source documentation. This becomes your “Bible” and is always available for reference.
When you have made it this far, you have a decision to make. If you want iOS development to be a hobby or something you do on the side because it is fun, you can just keep trying to build more projects. If you become more serious about improving your skills and abilities, you will want to look for more advanced resources.
Apple has produced a series of books designed for education that can also be used for those looking to teaching themselves. Start with Intro to App Development with Swift is that is what you want.
Another resource to consider is getting further education, such as a coding bootcamp or a college degree. Obtaining a degree in higher education is a great way to master the theory behind programming and can be a great stepping stone to future opportunities. A coding bootcamp is a much faster path to determine your attitude and aptitude fit, and to be able to start shipping apps. Often, this level of education is sufficient to start contributing as a junior developer, and you will learn even more of what is needed to succeed on the job. However, many people that finish a coding bootcamp still need to continue to invest serious time in creating apps and gaining experience before they are ready to be employed.
Hopefully this has been useful if you are considering getting started with iOS development. It is a magical opportunity of pure creation. I hope you will join me on this exciting journey.
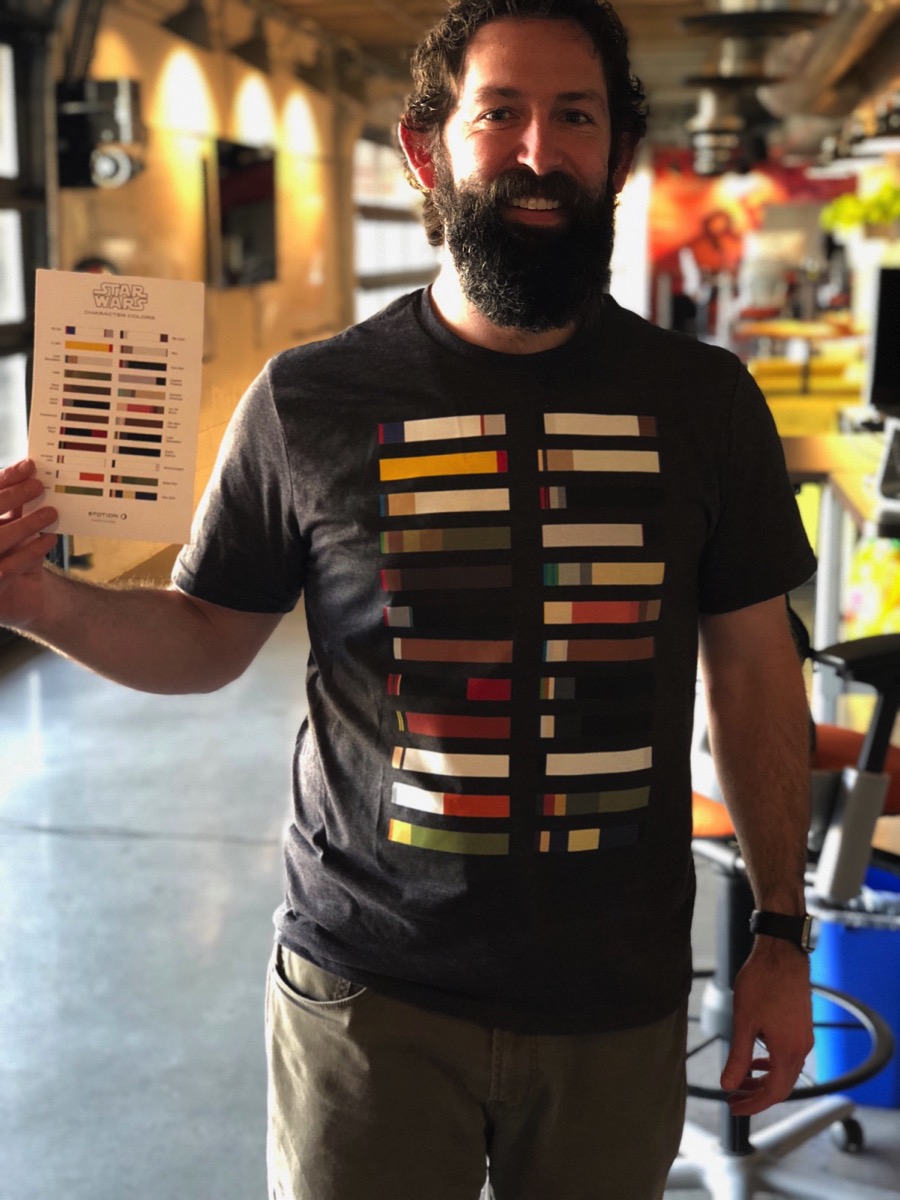
Just lovin’ my Star Wars character color palette shirt from my good friend @stotion, designed by @mlbeynon

🎥 Murder on the Orient Express
Date (with baby)
📖 🛏 Anne of Avonlea
By L. M. Montgomery
🎥 The Greatest Showman
With my mom and older three kids
📖 Artemis
By Andy Weir
📖 Dust
By Hugh Howey
Finally have everything ready for the kids’ Christmas. Such a magical time with little ones! 🎄❄️✨
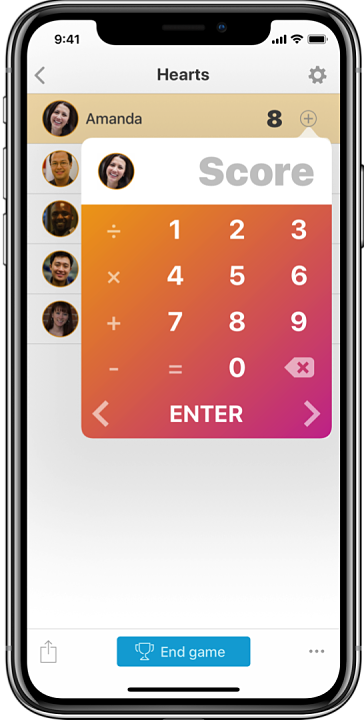
Excited to update my free scorekeeping app Pointedly in time for the holidays. Check it out here.

📖 🎧 Hero: Becoming the Strong Father Your Children Need
By Meg Meeker, MD
🎥 Star Wars 8: The Last Jedi
With IT department
📖 🎧 Endurance: Shackleton’s Incredible Voyage
By Alfred Lansing
📖 Shift
By Hugh Howey
📖 🛏 Anne of Green Gables
By L. M. Montgomery
🎥 LEGO Ninjago
with four older kids
Enjoyed a lovely holiday with family today. Hope everyone had a chance to reflect on gratitude. Happy Thanksgiving! 🦃
📖 Wool
By Hugh Howey
🎥 Thor: Ragnarok
with brother-in-law
🎥 Justice League
with brothers-in-law
Apple generally provides us as developers plenty of notice to make updates, whether explicit or implied. There are a number of these that I have been doing slowly this year for various reasons—High Sierra, Swift 4, iPhone X layout. Starting at WWDC, we could have been updating our apps to be prepared for the iPhone X layout changes, although none of us knew exactly what to expect. All we knew was that “safe area layout guides” were a thing and we should be using them.
Since receiving my own iPhone X, I have been much more motivated to get my own apps updated to work better with the unique layout challenges. I wanted to capture some of the standard changes I find myself making repeatedly.
Note: I make heavy use of storyboards, so most of my explanations will involve Interface Builder.
The first crucial step is to enable safe area layout guides in the storyboard. When updating from Xcode 8 to Xcode 9, this setting will be off by default, while any new storyboards created in Xcode 9 will have it enabled by default. Simply open the file inspector (the first inspector in the right pane in Xcode), and check the box named “Use Safe Area Layout Guides” to enable them.
Through the content view in UITableViewCell, table views work almost magically with the iPhone X. One of the main changes I have found is that the table view itself needs to be constrained to the actual view of the view controller, and not the safe area. If you had the table view constrained to the edges in Xcode 8, when you enable the safe area layout guides, those constraints will be converted to be relative to the safe area. For a table view, you don’t want that. You need to go in and modify each constraint to be relative to the superview instead.
Many of my custom table view cells will have a custom separator line. This is common if different cells in the same table need to have different separators. Typically, those views were constrained to the content view of the cell. However, that will leave the separators inset when in landscape mode because of the safe area layout guides. Instead, constrain the views to the cell itself. The exception to this rule is for separators that should be inset, typically on the leading edge. In that case, the leading edge of the view should remain constrained to the content view of the cell in order to retain the proper inset.
Many designs have a view at the bottom of the screen. This view would typically be constrained to the bottom layout guide previously, and that constraint would be converted to be relative to the safe area. This will leave an unsightly gap at the bottom of the screen.
 Bottom view constrained to safe area
There are two solutions I have used to correct this situation. The first is to simply add an extra UIView with a matching background color below the original view. That view will be constrained to the leading and trailing of the original view, and the bottom will be constrained to the superview—not the safe area. Then with a vertical spacing constraint between the views, you are set. When on a device where the safe area is the bottom of the device, the extra view will have a height of 0. On the iPhone X, the extra view will go from the bottom of the screen up to the bottom of the safe area.
The other solution is very similar, but instead of placing the view below your original view, it is embedded inside of it with a clear background color. Then you change the constraints of the original view to be to the superview and not the safe area. Then any views you have inside of your original view will have their bottom relative to this new spacer view. This is definitely the preferred solution if your original view is a visual effect view.
There are many more adjustments to consider when updating an app for the iPhone X, but these are the most common situations I have encountered. I look forward to having my apps feel at home on this new device.
Final micro.blog photo challenge entry for day seven: shadow 📷
I have written before about my attempts to publish to my GitHub Pages blog from iOS. I have recently started using Working Copy to make this even easier. Basically, I am trying to remove all of my excuses in the hopes that I will be more diligent in posting to my blog.
There are three pieces to my new process that I want to explore:
Since September 2016, I have been publishing microblog posts to my own site in addition to sharing them on Twitter or Instagram, and more recently on Micro.blog. This has come as a direct result of listening to Manton Reece and agreeing with his thoughts on owning your content. I want to continue the simplicity of being able to post a thought quickly, particularly with an image since I am often sharing my sketchnotes.
Prior to using Working Copy, my process involved Workflow recipes that made use of the GitHub API to post the content to my site repository. Essentially, I still use the same process in terms of taking the text or images and publishing them to my site. But my new Workflow recipe is considerably simpler, and leverages Working Copy and X-Callback-URLs to simplify the process.
My favorite writing app, iA Writer, gives me great flexibility in writing my posts. I have gone back and forth on storing my drafts just in iA Writer using iCloud, or having them live in my site repository. Thanks to iA Writer’s feature of opening directly a file from another app, and Working Copy serving as a document provider, I can create a draft in Working Copy and edit it in iA Writer. As of now, my current process is to create a draft in iA Writer using this Workflow. When I feel like it is ready, I will publish it as a draft to my site using this Workflow. That gives me the chance to see it in context on my site, together with all images and links and make sure that everything looks good and works properly.
The final step is taking my post from draft status to published. As I mentioned, at this point the post is live on my site in the Drafts section, so I can proofread and check everything. I do my editing either in Working Copy or iA Writer, committing the changes back to GitHub. When I am finally ready to pull the trigger, this Workflow essentially moves the file from the Drafts folder to the Posts folder, and edits the file name a bit to make it an official post on my blog. The Workflow takes me to my site at the end so I can see the post one last time in all its published glory.
Using Working Copy on my iPad / iPhone means that I always have the entire source code of my site with me. It has made life so much easier when I want to edit or tweak the site. Since I prefer to write in Markdown, and to do everything on an iOS device, this has been the ideal setup for me. Simple integrations with Workflow keep process frictionless. Hopefully this is enough to help ensure that I post more often to my blog.
Just for reference, here are all of the Workflow recipes I am currently using for this process:
Day six of the micro.blog photo challenge: seasonal 📷
Day five of micro.blog photo challenge: liquid 📷